Intersection Observer API 使用筆記
剛進入業界時,為了提高網頁的效能以及更豐富的網頁互動效果,會利用 bLazy.js 實作圖片延遲載入或是用 waypoints.js 執行間單的進場效果。不過後來發現 Intersection Observer 這個瀏覽器原生的 Web API 讓這一切變得更簡單使用而且效能也更好。
在本文當種會提到這些內容:
- 生活中的 Intersection Observer
IntersectionObserver建構函式IntersectionObserver實例方法- Gridsome 的
IntersectionObserver應用
前言
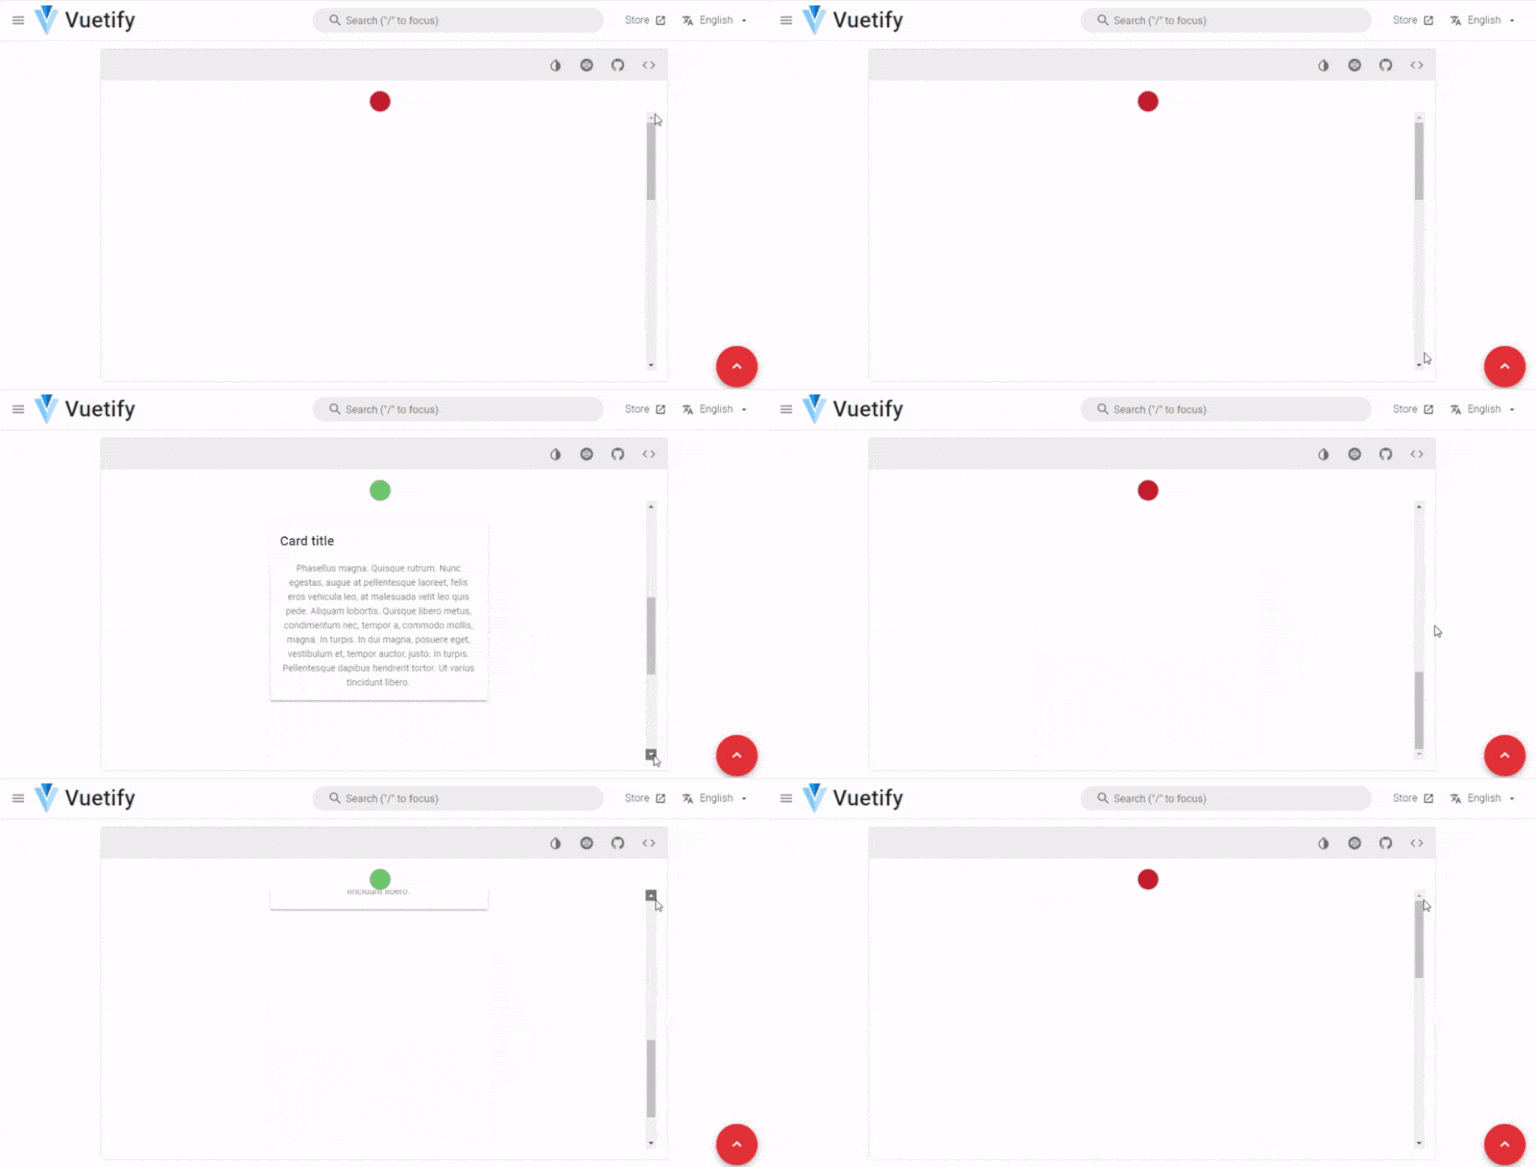
Intersection Observer API 被廣泛應用在現在前端的各項工具種。像是 Grisdome 中的內建組件 <g-image> 以及 <g-link> 分別利用了這個 API 實踐了 延遲載入(Lazy Load) 及 路由預載(Route Prefetching);Nuxt.js 的 <nuxt-link> 也用它來判斷使否路由預載;Vuetify 也提供了 v-intersect directive 讓使用者可以靈活應用。
綜合過去看到的 Intersection Observer 大多應用在:
- 延遲載入(Lazy Load)
- 路由預載(Route Prefetching)
- 無限捲動(Infinite Scroll)
而這篇會聚焦在 Intersection Observer API 上,最後會簡單的看過 Gridsome 的內建組件如何應用 IntersectionObserver 來實作 Lazy Load 和 Route Prefetching 的功能。
生活中的 Intersection Observer
Intersection Observer,字面意思:交點觀察者。用一個真實例子比喻 Intersection Observer 運作概念:等公車 APP
早期公車站只有一根站牌立在哪裡,想要搭公車,就得在車站一直望著遠方,只要一有公車出現都要確認是不是自己要搭得那一班,想要去便利商店買個飲料也要不斷緊張車是子會不會突然出現。
後來,出現了跑馬燈告訴你車子現在在哪個路口,大約還要多久。眼前出現的都不是我們要的,讓我們可以有效的掌握時間,做點其他事;再後來出現了手機 APP,我們甚至可以設定公車在進入指定 " 觀察區 " 時會發出通知,告訴我們車子快到了,這樣在手機拎鈴響前我們就可以從容地做其他事了。
不是有公車時刻表?呵,有準過嗎!
開頭提到的 bLazy.js 或 waypoints.js 本質上都是透過監聽 scroll 事件,不斷重複確認指定元素當前的位置,直到出現在指定位置後執行圖片載入或指定的 function。這過程之間就是不斷、不斷的去占用 JavaScript 的執行效能。
就跟我們需要不斷的確認公車來了沒,不斷確認眼前的車是不是自己要搭的一樣。
Intersection Observer API 的出現改善了這個問題,他類似等公車的手機 APP。當目標與我們指定的「觀察區」產生交集我們在去對其做處理,他不會占用我們的心思,省下來的精力就可以拿去執行其他任務,或是 ... 放空。
IntersectionObserver 建構函式
Intersection Observer API 提供了一個 非同步 的目標元素與觀察區是否相交的方法,我們可以透過建構函式來產生一個 observer 的實例使用它。
建構函式
IntersectionObserver 建構函式定義如下:
declare var IntersectionObserver: {
  prototype: IntersectionObserver;
  new (
    callback: IntersectionObserverCallback,
    options?: IntersectionObserverInit
  ): IntersectionObserver;
};
IntersectionObserver 建構函式接收兩個參數,先來了解 options 的設定內容,他是是一個定義觀察區的設定物件;後面再來看看如何使用 callback,他是當被觀察元素與觀察區產生交集後執行的 callback function。
options(選填)
options 為選填物件,一共有三個選填屬性可以設定:
interface IntersectionObserverInit {
  root?: Element | null;
  rootMargin?: string;
  threshold?: number | number[];
}
root- Type:
Element | null - Default:
null - 要觀察的 Element 的上層 Element。如果沒有設定則為
null,預設情框下觀察的範圍為 top-level document's viewport,我解釋為螢幕的框框。
- Type:
rootMargin- Type:
string - Default:
0px 0px 0px 0px - rootMargin 定義的是
rootElement 的邊界。透過這個屬性放大或縮小我們觀測的範圍,填寫方式跟 CSS 的 margin 屬性類似,但單位只接受 像素(px)及 百分比(%)。
例如:'5px' // all margins set to 5px '5px 10%' // top & bottom = 5px, right & left = 10% '-10px 5px 8%' // top = -10px, right & left = 5px, bottom = 8% '-10px -5px 5px 8%' // top = -10px, right = -5px, bottom = 5px, left = 8%
注意- 可接受的單位為像素(px)及百分比(%),如果使用無單位、rem、em 會噴出以下錯誤:
Uncaught DOMException: Failed to construct 'IntersectionObserver': rootMargin must be specified in pixels or percent.- 如上圖所示,負值擴大 root 範圍,正值縮小 root 範圍。
看看這張圖吧!(取自:Now You See Me: How To Defer, Lazy-Load And Act With IntersectionObserver)。 {> loading=lazy width=794 }
- Type:
threshold- Type:
number | number[] - Default:0
- 閾?(google 翻譯),表示相交多少比例會呼叫 callback function。它可以是一個數字,或是數字陣列。例如:0, 0.5, 1.0,分別表示:在觀察區的邊界外、與觀察區交集 50%、完全出現在觀察區的邊界內。注意:這沒有方向性,不論是由上往下捲動,或是由下往上捲動都適用。數字區間只能在 0 - 1.0 之間。
- Type:
callback function
interface IntersectionObserverCallback {
  (entries: IntersectionObserverEntry[], observer: IntersectionObserver): void;
}
設定觀察元素與觀察區達到 threshold 這定的比例時要執行的 function,這個 callback function 帶了兩個參數:
entries- Type:
IntersectionObserverEntry[]interface IntersectionObserverEntry { readonly boundingClientRect: DOMRectReadOnly; readonly intersectionRatio: number; readonly intersectionRect: DOMRectReadOnly; readonly isIntersecting: boolean; readonly rootBounds: DOMRectReadOnly | null; readonly target: Element; readonly time: number; } - entries 為一個陣列,裏面包含了要執行 callback 的 DOM 資料,分別來說明一下這包資料裡面的屬性。
boundingClientRect、intersectionRect、rootBounds引用一張圖片來解釋 {> loading=lazy width=794 }
rootBounds: 「觀察區」的矩形資料DOMRectReadOnly。boundingClientRect: 當下觸發 callback function 的「整個被觀察元素」矩形資料,在圖上指的是整個紅色區域。intersectionRect: 表示已出現在觀察區內的被觀察元素矩形資料,或是說相交、重疊區域的部分。
上面提到的矩形資料,詳細內容可以查詢Element.getBoundingClientRect()這個 API
以下的部分比較好理解,簡單帶過。intersectionRatio: 表示與root重疊的比例。isIntersecting: 被觀察元素 是否與root相交,可以用來判斷當 callback function 觸發時,觀察元素與觀察區是否有重疊。target: 這整包相交資料是屬於哪一個「被觀察元素」。time: 建立IntersectionObserver實例後到處發 callback 經過的時間。
- Type:
observer- Type:
IntersectionObserver IntersectionObserver的實例。
- Type:
callback function 的執行時機
根據 MDN 上的說明,Intersection Observer 是一個 非同步 的 Web API!那 callback function 是何時會執行呢?
其實在 Intersection Observer 的底層,callback function 會在 window.requestIdleCallback() 中被觸發,這個 API 會在畫面更新的每一幀(frame)的最後執行。而預設 timeout(超時強制執行時間)約為 100ms,表示在強制執行時間到以前,只要 JavaScript 的執行線程沒有被空下來,他都不會執行。
除非在這期間呼叫 IntersectionObserver.takeRecords(),這個在實例方法裡面會提到。
另外一點是,callback function 第一次被呼叫的時間點其實是在將被觀察元素指定給 Intersection Observer 實力的那一刻,也是就是等等會提到的實例方法 IntersectionObserver.observe(),這時不論被觀察元素是否與觀察區有交集,都會執行。所以在實作上建議要去判斷 intersectionRatio 的值來決定是否執行 callback function,不然以為做了 Lazy Load,實則初始化當下就全部都載入了。
IntersectionObserver 實例方法
看看 IntersectionObserver 的 interface 定義吧!
interface IntersectionObserver {
  readonly root: Element | null;
  readonly rootMargin: string;
  readonly thresholds: ReadonlyArray<number>;
  disconnect(): void;
  observe(target: Element): void;
  takeRecords(): IntersectionObserverEntry[];
  unobserve(target: Element): void;
}
除了前面設定的 options 三個屬性的唯讀資料外,還實例提供了四個 method
observe()
告訴 IntersectionObserver 實例要觀察哪些元素。unobserve()
告訴 IntersectionObserver 實例要取消觀察哪一個元素。disconnect()
停用整個 IntersectionObserver。takeRecords()
呼叫他會回傳一個 已觀察到進入觀察區,但是尚未呼叫 callback function 的元素陣列,並清空待呼叫 callback function 的元素陣列
Intersection Observer 要等 JavaScript 執行續空閒下來才回執行,是非同步呼叫 callback function。假如需要立刻知道當下有沒有任何元素進入觀察區,可以使用他,但同時也會清空即將呼叫 callback 的陣列,callback function 就不會執行。
然後真的,目前也沒看過哪裡用到它。然後我花了最多篇幅解釋
Gridsome 的 IntersectionObserver 應用
最後看點範例。
這裡拿 Gridsome 0.7.17 的組件:<g-image> 以及 <g-link> 來說明他如何利用 Intersection Observer API 來設計 Lazy Load 跟 Route Prefetching 這兩個功能吧!
Gridsome 在設計組件時,分別將 DOM 渲染相關的 code 集中在 Component 裡面,而程式邏輯的部分則集中在 vue directives 裡面。而關於 Intersection Observer API 的應用藏在 gridsome/app/directives 裡面。
另外先提兩個部分,接下來會看到的 caniuse.IntersectionObserver 為 boolean 值,用以確認 global 下是否支援這個 API,另外 createObserver 這個 function 他原始碼如下:
export function createObserver (handler, options = {}) {
  const observer = new IntersectionObserver(entries => {
    entries.forEach(handler)
  }, {
    rootMargin: '20px',
    threshold: 0.1,
    ...options
  })

  return observer
}
呼叫 createObserver() 他會 new 一個 IntersectionObserver 並將其實例 return 給我們使用,預設的 options 為 { rootMargin: '20px', threshold: 0.1 }。
g-image 的 Lazy Load
原始碼(經過簡化)
import caniuse from '../utils/caniuse'
import { addClass, removeClass } from '../utils/class'
import { createObserver } from '../utils/intersectionObserver'

const observer = caniuse.IntersectionObserver
  ? createObserver(intersectionHandler)
  : null

export default {
  inserted (el) {
    observe(el)
  },
  update (el) {
    observe(el)
  },
  unbind (el) {
    unobserve(el)
  }
}

function intersectionHandler ({ intersectionRatio, target }) {
  if (intersectionRatio > 0) {
    observer.unobserve(target)
    loadImage(target)
  }
}

function observe (el) {
  if (!observer) loadImage(el)
  else observer.observe(el)
}

function unobserve (el) {
  if (observer) {
    observer.unobserve(el)
  }
}

function loadImage (el) {
  const src = el.getAttribute('data-src')

  if (!src || el.src.endsWith(src)) {
    return // src is already switched
  }

  el.onload = () => {
    removeClass(el, 'g-image--loading')
    addClass(el, 'g-image--loaded')
  }

  el.src = src
}
當圖片元素與畫面產生交集後會呼叫 intersectionHandler(),並確認 intersectionRatio(重疊比例)是否大於 0,如果大於則表示元素出現在觀察區內,則立即將該元素解除觀察,接著執行載入圖片的 function loadImage(el)。在 loadImage(el) 裡面會將 <g-image> 組件準備好的 data-src,替換到圖片的 src 上,完成 Lazy Load 動作。
g-link 的 Route Prefetching
Gridsome 的路由預取(Route Prefetching)主要實作是利用 Vue Router 去取得需要的組件,詳細的 code 在 fetch 裡面,這邊就不挖開來看了。至於他要如何判定要預取哪些部分,依靠的也是 intersectionHandler。
原始碼
import fetch from '../fetch'
import router from '../router'
import caniuse from '../utils/caniuse'
import { stripPathPrefix } from '../utils/helpers'
import { createObserver } from '../utils/intersectionObserver'

const isPreloaded = {}

const observer = caniuse.IntersectionObserver
  ? createObserver(intersectionHandler)
  : null

export default {
  inserted (el) {
    observer && observer.observe(el)
  },
  unbind (el) {
    observer && observer.unobserve(el)
  }
}

function intersectionHandler ({ intersectionRatio, target }) {
  if (process.isClient) {
    if (intersectionRatio > 0) {
      observer.unobserve(target)

      if (document.location.hostname === target.hostname) {
        if (isPreloaded[target.pathname]) return
        else isPreloaded[target.pathname] = true

        const path = stripPathPrefix(target.pathname)
        const { route } = router.resolve({ path })

        setTimeout(() => fetch(route, { shouldPrefetch: true }), 250)
      }
    }
  }
}
只看 intersectionHandler() 的部分。
一樣一旦連結元素出現在觀察區內便立即解除該觀察元素,並在延遲 250ms 後 fetch() 取得該路由頁面的資料與組件該頁面的組件,這樣一來當使用者點擊路由時,因為相關資料與組件已經先預取完成,在切換畫面上就會更為順暢。類似的作法在 Nuxt.js 的 <nuxt-link> 裡面也有使用到。
結語
Intersection Observer API 推出很長一段時間了,儘管 IE 11 預設情況下不支援但還是可以使用 polyfill 來實現。
另外在 Chrome 目前實作的為 Intersection Observer v2,在建構函式的 options 選像多了兩個參數 trackVisibility 跟 delay,預設分別為 falst 跟 0,但因為只有 Chromium 核心瀏覽器有實現,加上 google 官方還是比較建議以 v1 為主,所以有興趣的捧油可以到參考連結看看。
參考連結
- IntersectionObserver:上篇-基本介紹及使用
- IntersectionObserver API 使用教程 - 阮一峰的网络日志
- IntersectionObserver - Web APIs | MDN
- Intersection Observer API - Web APIs | MDN
- Now You See Me: How To Defer, Lazy-Load And Act With IntersectionObserver
- IntersectionObserver’s Coming into View
關於 Intersection Observer v2 的部分
請我喝杯咖啡
如果這裡的內容有幫助到你的話,一杯咖啡就是對我最大的鼓勵。